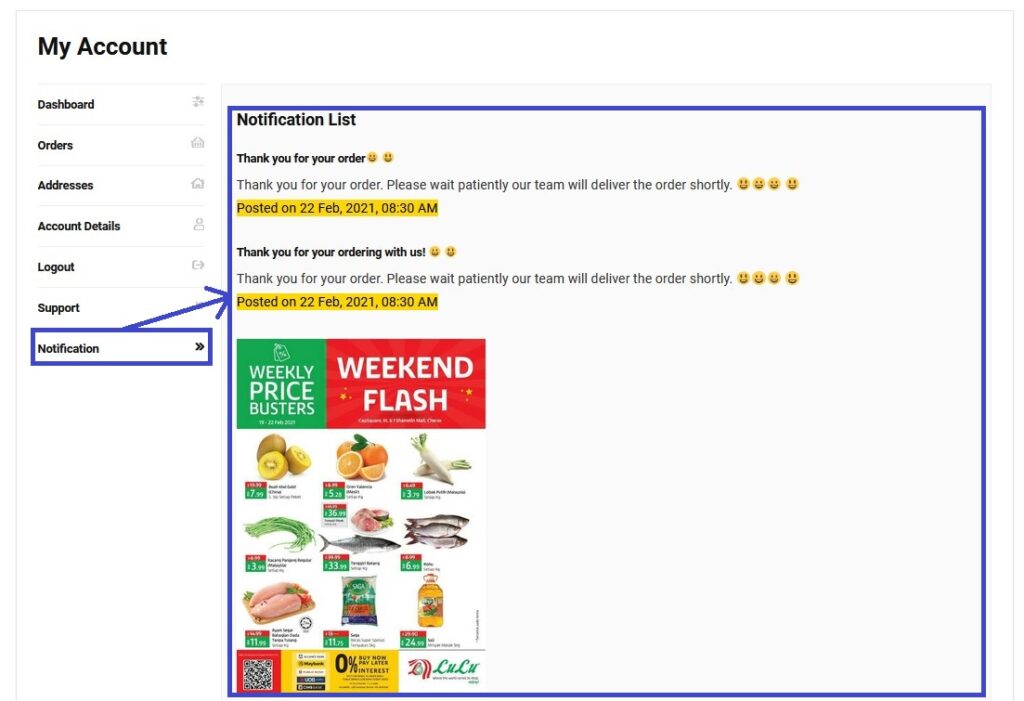
Are you looking for a straight way to add a new tab in my-account page in WooCommerce that can be implemented quickly and easily by any WooCommerce user irrespective of their level of skill?
Today, I’m going to show you how to add a custom tab on the WooCommerce My Account page – feel free to leave a comment below if you found this tutorial useful

To add a new tab in the WooCommerce my-account page, it entails four steps as follows:
- Create a filter hook to add the new tab in my-account page and the filter should gather all the data that is displayed on the menu and then push in your new data.
- Create a second filter that adds the URL redirect of the menu you added in the first step to the page you have created just now.
- Adding the new endpoint under the Account menu
- Add this code to your theme’s functions.php file or you can add this code to a plugin class or function and you will successfully add the new menu on my account page in WooCommerce.
- Add the First Filter to Add Menu to My-Account Page
// Note: Resave Permalinks or it will give 404 error
function myaccount_add_notification_endpoint() {
    add_rewrite_endpoint( 'notification', EP_ROOT | EP_PAGES );
}
add_action( 'init', 'myaccount_add_notification_endpoint' );
This gonna create the new endpoint “notification” the new menu on my account page.
2. Add Second Filter to Add Menu to My-Account Page
function myaccount_add_notification_query_vars( $vars ) {
    $vars[] = 'notification';
    return $vars;
}
add_filter( 'query_vars', 'myaccount_add_notification_query_vars', 0 );
3. Insert the new endpoint into the My Account menu
function myaccount_add_notification_link_my_account( $items ) {
    $items['notification'] = 'Notification';
    return $items;
}
add_filter( 'woocommerce_account_menu_items', 'myaccount_add_notification_link_my_account' );
4. Add content to the new endpoint
function myaccount_add_notification_content() {
echo '<h3>Welcome to the new page</h3>;
echo do_shortcode( ' /* your-shortcode-here */ ' );
}
add_action( 'woocommerce_account_notification_endpoint', 'myaccount_add_notification_content' );
// Note: add_action must follow 'woocommerce_account_{your-endpoint-slug}_endpoint' format
Wrapping Up! You can find the whole code at the end of the post 😉
Adding a new menu tab in my-account page on WooCommerce should not be a challenge anymore after reading this tutorial. I have tried to explain step-by-step and with a practical example on how to add a new tab in my-account page and add the content of your choice. I have also written other tutorials on how to show Store(Vendor) Name on Checkout page in WordPress and add a checkbox in checkout page for customer whether wants to be a member & send customer details to email.
PHP snippet: How to Add a New Tab in My Account Page
// How Use => Add the below function in your theme's functions.php file
// Output  => https://snipboard.io/dDeMmK.jpg
/**
 * @snippet       WooCommerce Add A New Tab In My Account
 * @author        Nazrul Kabir(www.nazrulkabir.com)
 * @compatible    WooCommerce 3.5.7+
 */
// ------------------
// 1. Register new endpoint to use for My Account page
// Note: Resave Permalinks or it will give 404 error
function myaccount_add_notification_endpoint() {
    add_rewrite_endpoint( 'notification', EP_ROOT | EP_PAGES );
}
add_action( 'init', 'myaccount_add_notification_endpoint' );
// ------------------
// 2. Add new query var
function myaccount_add_notification_query_vars( $vars ) {
    $vars[] = 'notification';
    return $vars;
}
add_filter( 'query_vars', 'myaccount_add_notification_query_vars', 0 );
// ------------------
// 3. Insert the new endpoint into the My Account menu
function myaccount_add_notification_link_my_account( $items ) {
    $items['notification'] = 'Notification';
    return $items;
}
add_filter( 'woocommerce_account_menu_items', 'myaccount_add_notification_link_my_account' );
// ------------------
// 4. Add content to the new endpoint
function myaccount_add_notification_content() {
    echo '<h3>Notification List</h3>';
    echo do_shortcode( ' /* your-shortcode-here */ ' );
}
add_action( 'woocommerce_account_notification_endpoint', 'myaccount_add_notification_content' );
// Note: add_action must follow 'woocommerce_account_{your-endpoint-slug}_endpoint' format
If you’ve any confusion please let me know 🙂
